Photo Editing Tips | How To Make Color Temperature Adjustment in Adobe Camera RAW
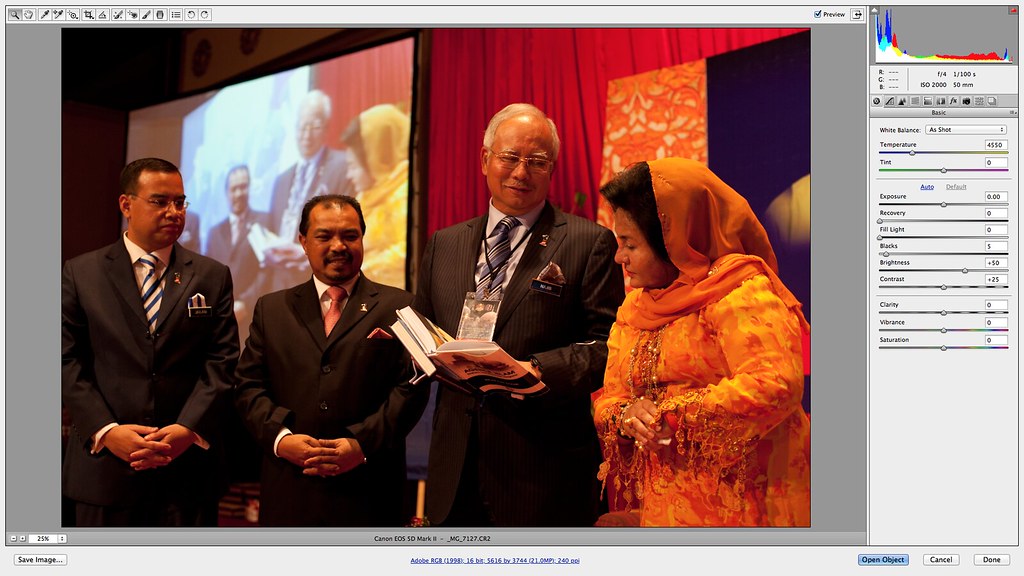
© 2012 Wazari Wazir | Original Photograph | Unedited | Shoot in RAW
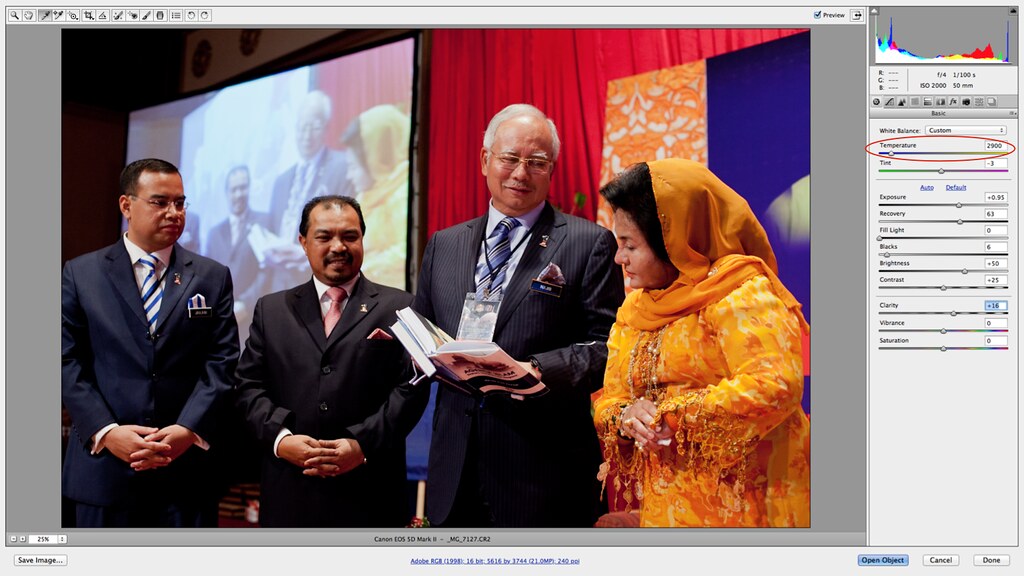
© 2012 Wazari Wazir | After Color Temperature Adjustment in Adobe Camera RAW
The photograph above were taken without flash, during the launch of Prime Minister Najib Razak latest book titled “The Islamic Agenda in Transforming the Nation” at Putra World Trade Centre (PWTC) Kuala Lumpur on June 25th 2012. I just use available light and my camera were set on Auto White Balance Mode. Just to let you know that Auto WB is not a full proof, meaning that we cannot depend on Auto WB in critical lighting condition, that’s why Most cameras include white balance presets for different lighting situations, usually daylight, shade, cloudy, tungsten, flash, and fluorescent but since I’m shooting with RAW, I just set to Auto WB and the result is like the photograph above, too yellow.
There are few ways on how you can correct the White Balance in Camera RAW and among my favorite is by using the Color Temperature sliders, if the photograph look too warm, all I have to do is to drag the Temperature slider to the Left and reduce the yellowish. How far you wanted to reduce the temperature is up to you, I mean whatever that look natural to your eye. Let your eye be the judge and trust for eye.
This is for non critical shot, but if you really wanted a perfect color correction like product shoot or advertising, then you might wanted to consider using Spyder4pro from Datacolor, for general photography shot, using color temperature slider might do the job, yes there are other ways to color correct on ACR or in Photoshop but for most of the times, this is what I do for color correct.

