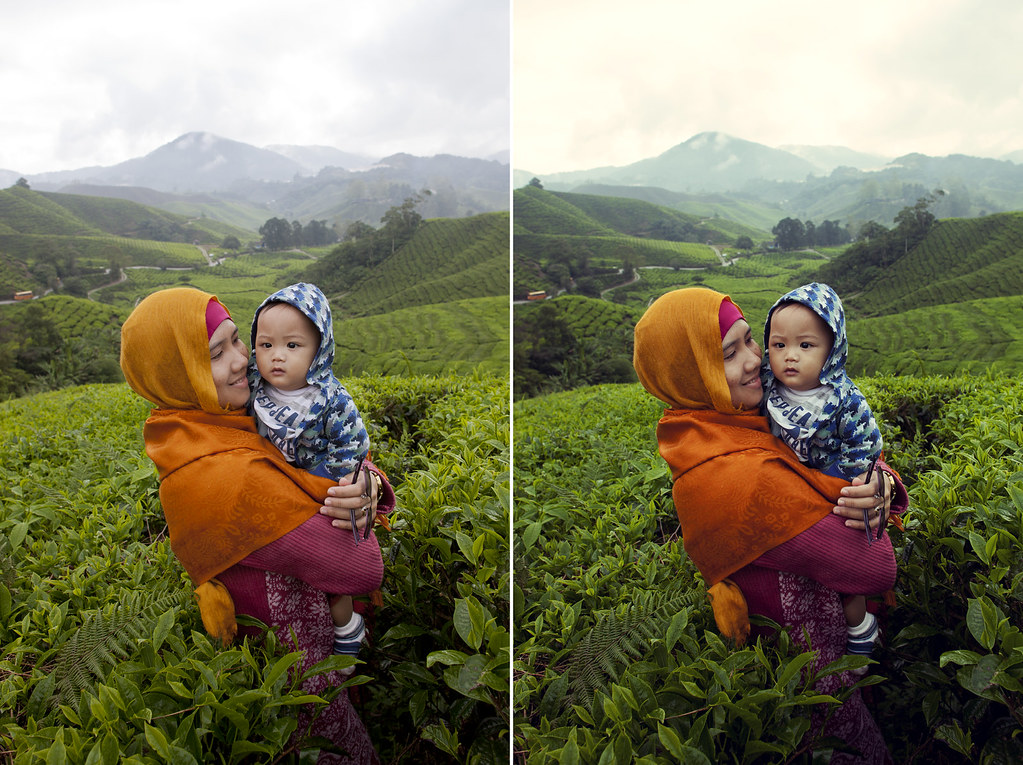
Photoshop Editing | Playing With Color Tones
© 2012 Wazari Wazir | (Left) Original | (Right) After Editing With Photoshop
I’ve wrote once that if we wanted to sell our pictures to the magazines or any publication, whether it is online or printed version, try to keep the color as natural as possible, it was very simple, the magazines, especially the travel magazine wanted to tell the truth, they don’t want to present false information. If the sky is blue, let it blue and if the grass is green, keep it green.
On the other hand if you wanted to experiment with colors, play with portraiture or lifestyle photography, or simply for your very own personal blog or maybe for some clients that wanted their pictures to be a little bit different, there is nothing wrong to play with color tones. Yes, some people will hate you for doing so and some people will beg you to show them how.
Anyway if you have visited my flickr recently and look at the recent pictures of my family trips to Cameron Highlands, you will notice that for most of the photographs, I keep the original colors, just a little bit of an enhancement. For the photograph above, I use one of the technique in my Photoshop Tone eBook to get the tone.
I use curves in Photoshop to get the tone, how much effect or how depth of the tone that you like to have, depend on you, feel free to push the slider up and down until you get a desired result. Maybe you say that the result is subtle, barely noticeable, that’s the idea actually, just minimal adjustment. You may like the original version or you might like the tone version. It is good to have some extra Photoshop editing skills, even though it is not a requirement or mandatory for anyone who wanted to be a photographer to know Photoshop but it is better to have two skills, or multiple skills, instead of just one.
* To learn further about the Photoshop Tone, just hit the banner below…

